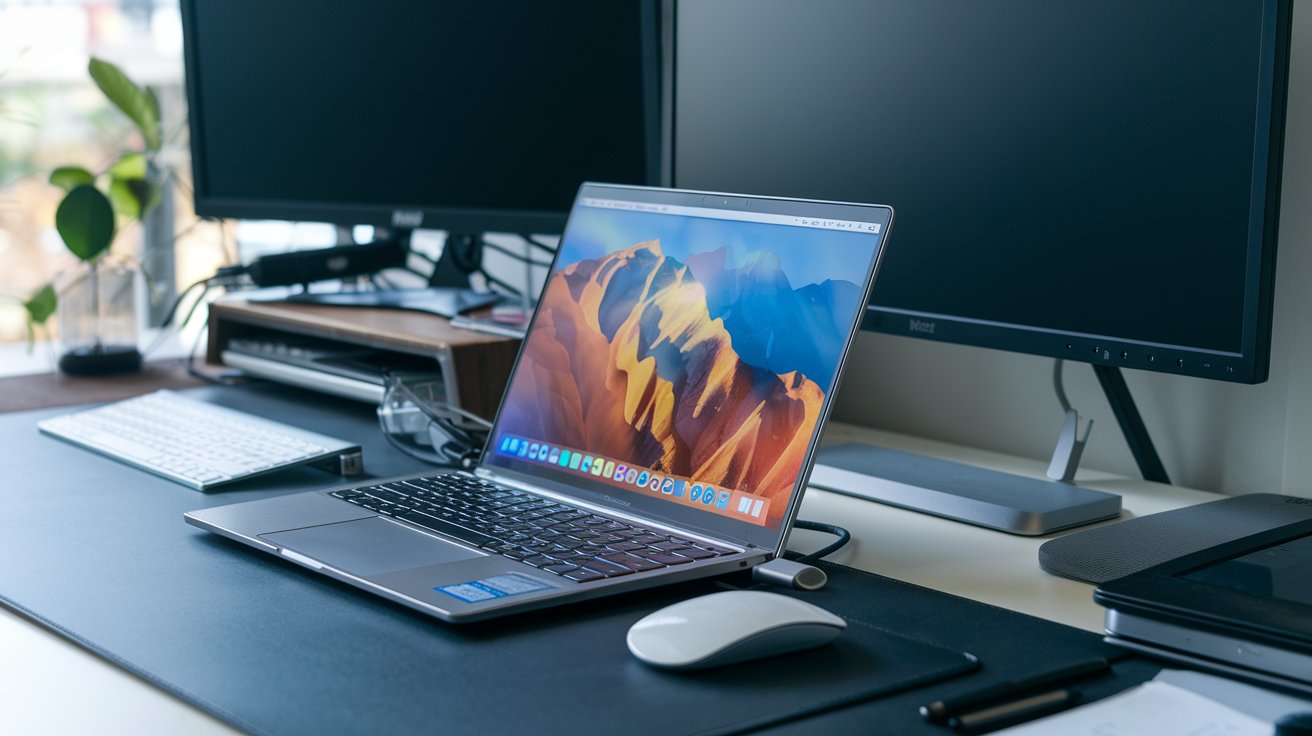
Connecting an external monitor to your laptop expands your workspace and significantly improves productivity by providing additional screen real estate. Whether you use Windows 10, Windows 11, or macOS, the process involves identifying the correct ports on both devices, using compatible cables, and configuring display settings to recognize and optimize both screens. This comprehensive guide covers every connection method available in 2026, from traditional HDMI and DisplayPort cables to modern USB-C and wireless solutions.
Understanding Laptop and Monitor Ports
Before you connect your laptop to an external monitor, identifying the available ports on both devices is essential. Modern laptops manufactured in 2025-2026 typically feature USB-C ports with DisplayPort Alt Mode, HDMI 2.1 ports, and occasionally Thunderbolt 4 connections. Older models may include VGA, DVI, or Mini DisplayPort options. Your external monitor will have corresponding input ports, commonly HDMI, DisplayPort, USB-C, or DVI connections that determine which cable you need.
The USB-C port with DisplayPort Alt Mode has become the industry standard for laptops in 2026, capable of transmitting both video and power through a single cable. According to recent technology adoption data, approximately 78% of laptops sold in the United States in 2025 included at least one USB-C port with video output capability. HDMI remains the most universally compatible option, with HDMI 2.1 supporting resolutions up to 8K at 60Hz or 4K at 120Hz, making it ideal for high-refresh-rate gaming monitors and professional design work.
How to Connect a Monitor to a Laptop with HDMI
The HDMI connection method remains the most straightforward approach to connect external displays to laptops in 2026. Most consumer laptops and monitors manufactured within the past five years include HDMI ports, making this the most accessible option for the majority of users. The process requires an HDMI cable, which you can purchase at electronics retailers across the United States for between fifteen and forty dollars, depending on cable length and certification level.
Step-by-Step HDMI Connection Process
First, ensure both your laptop and monitor are powered off to prevent potential signal detection issues. Connect one end of the HDMI cable to your laptop’s HDMI port, typically located on the side panel, and the other end to your monitor’s HDMI input port. Power on your monitor first, then start your laptop. Most modern systems will automatically detect the external display within five to ten seconds. If your monitor has multiple HDMI inputs, use the monitor’s physical buttons or on-screen display menu to select the correct HDMI input channel that matches your connection.
For Dell, HP, Lenovo, and ASUS laptops running Windows 11, the operating system typically recognizes the external monitor immediately and extends your desktop automatically. You can verify the connection by pressing the Windows key plus P simultaneously, which opens the Project menu offering four display modes: PC screen only, Duplicate, Extend, and Second screen only. The Extend option is most popular for productivity work, allowing you to drag windows between your laptop screen and the external monitor seamlessly.
Troubleshooting HDMI Connection Issues
If your laptop does not recognize your external monitor via HDMI, several troubleshooting steps can resolve common issues. First, verify that the HDMI cable is fully seated in both ports and check for any visible damage to the cable or connectors. Try connecting the monitor to a different device to confirm the monitor and cable function properly. Update your laptop’s graphics drivers through Device Manager on Windows or System Preferences on Mac, as outdated drivers frequently cause detection failures.
For Windows 10 and Windows 11 systems, navigate to Settings, then System, then Display, and click the Detect button to force the operating system to search for connected displays. Approximately 60% of HDMI detection problems in 2026 stem from outdated graphics drivers or incorrect input source selection on the monitor itself. If problems persist, restart your laptop with the monitor connected and powered on, as some systems only detect external displays during the boot sequence.
How to Connect External Monitor to Laptop Windows 11
Windows 11 introduced enhanced multi-monitor support and display management features that simplify the process of connecting and configuring external monitors. The operating system automatically detects most monitors within seconds of connection and applies optimal resolution settings based on the monitor’s capabilities. Windows 11’s improved display scaling ensures text and interface elements remain crisp on high-DPI monitors, addressing a common complaint from earlier Windows versions.
To configure your external monitor in Windows 11, right-click on the desktop and select Display settings, or press Windows key plus I to open Settings, then navigate to System and Display. Here you will see visual representations of your connected displays, numbered according to their detection order. You can drag these display icons to match your physical monitor arrangement, ensuring your mouse cursor moves logically between screens. The Multiple displays dropdown menu offers options to extend your desktop, duplicate displays, or use only one screen.
Advanced Display Settings in Windows 11
Windows 11 provides granular control over individual monitor characteristics through Advanced display settings. Click on the external monitor representation, then scroll down to access resolution, refresh rate, and HDR settings specific to that display. For gaming monitors with high refresh rates, ensure you select the maximum supported refresh rate—typically 144Hz or 240Hz—rather than accepting the default 60Hz setting that Windows may initially apply.
The Scale and layout section allows you to adjust the size of text, apps, and other items independently for each monitor. This feature proves particularly valuable when combining a high-resolution 4K external monitor with a standard 1920×1080 laptop display, as it prevents interface elements from appearing too small on the 4K screen or too large on the laptop screen. Windows 11 recommends scaling percentages based on your monitor’s pixel density, with 150% or 175% common for 27-inch 4K monitors.
Setting Primary Display in Windows 11
Designating which screen serves as your primary display in Windows 11 determines where the taskbar, Start menu, and newly opened applications appear by default. In the Display settings, click on the monitor you want to set as primary, scroll down, and check the box labeled Make this my main display. The primary display designation becomes particularly important when working with applications that launch on a specific screen or when using presentation mode.
For professionals who disconnect and reconnect their laptop to external monitors frequently, Windows 11 remembers your display configuration preferences. When you reconnect a previously used monitor, the system automatically applies your saved settings, including resolution, arrangement, and primary display designation. This functionality saves considerable time for users who work with the same external monitor setup daily at home or office locations.
How to Connect a Monitor to a Laptop and Use Both Screens
Using both your laptop screen and an external monitor simultaneously creates an extended desktop workspace that dramatically improves productivity for multitasking scenarios. The extended display mode allows you to spread different applications across multiple screens, such as keeping email and communication tools on your laptop display while dedicating the larger external monitor to your primary work applications like spreadsheets, design software, or code editors.
After physically connecting your external monitor using any compatible method, configure the displays to extend rather than duplicate through your operating system’s display settings. In Windows, press Windows key plus P and select Extend. On macOS, open System Preferences, click Displays, then Arrangement, and uncheck Mirror Displays. Once configured, you can drag application windows between screens freely, and most applications will remember which screen you last used them on.
Optimizing Dual Screen Workflow
To maximize productivity with dual screen setups, arrange your displays in Settings to match their physical positions on your desk. If your external monitor sits to the right of your laptop, ensure the display representations in your system settings reflect this arrangement. This configuration ensures your mouse cursor moves naturally between screens in the expected direction, preventing the disorientation that occurs when digital and physical arrangements mismatch.
Power users can enhance their dual monitor experience with Windows 11’s Snap Layouts feature, which provides structured arrangements for organizing windows across multiple displays. Hover your cursor over a window’s maximize button to access Snap Layout options, allowing you to quickly position applications in predefined zones. Third-party utilities like DisplayFusion or Windows PowerToys FancyZones offer even more advanced window management capabilities for complex multi-monitor configurations popular among developers and financial professionals.
Managing Applications Across Multiple Displays
Most modern applications remember which monitor they were last used on and will reopen on that screen automatically. However, some legacy applications always launch on the primary display regardless of where you previously positioned them. To move such applications, use the keyboard shortcut Windows key plus Shift plus Left/Right Arrow to transfer windows between monitors quickly without dragging them manually.
For presentation scenarios or screen sharing during video calls, understanding display modes becomes critical. When sharing your screen in applications like Zoom, Microsoft Teams, or Google Meet, you can select which specific monitor to share, allowing you to present content from your external monitor while keeping notes or chat windows visible only on your laptop screen. This capability has become increasingly important for remote work, with studies showing that 68% of United States knowledge workers used dual monitor setups for video conferencing in 2025.
How to Connect Laptop to Monitor with USB-C
USB-C connections with DisplayPort Alt Mode represent the most modern and versatile method for connecting external monitors to laptops in 2026. A single USB-C cable can simultaneously transmit video, audio, and power, eliminating cable clutter while delivering video quality equivalent to or exceeding traditional display connections. USB-C supports resolutions up to 8K at 60Hz with DSC compression, making it suitable for professional video editing, 3D modeling, and high-resolution photography work.
To connect using USB-C, ensure both your laptop and monitor support USB-C video output and input respectively. Not all USB-C ports support video transmission—some are data-only ports—so verify your laptop’s specifications or look for the DisplayPort or Thunderbolt symbol next to the USB-C port. Connect a certified USB-C cable between your laptop and monitor, and the display should be recognized automatically. Many USB-C monitors also charge your laptop while connected, typically providing 60-96 watts of power delivery, sufficient to keep most laptops charged during normal use.
Thunderbolt 4 and USB4 Advantages
Laptops equipped with Thunderbolt 4 or USB4 ports offer enhanced capabilities beyond standard USB-C connections. These advanced protocols support daisy-chaining multiple monitors from a single laptop port, provide 40 Gbps bandwidth for smooth 4K 144Hz performance, and can drive up to two 4K displays or one 8K display simultaneously. Thunderbolt 4 docking stations have become increasingly popular in 2026, allowing users to connect multiple monitors, peripherals, and charging through a single cable to their laptop.
For MacBook Pro and MacBook Air users, Thunderbolt 4 connections support Apple’s high-resolution displays including the Studio Display and Pro Display XDR. The latest MacBook Pro models released in late 2025 support up to four external displays when using a combination of Thunderbolt 4 ports and HDMI, addressing previous limitations that frustrated professional users. Windows laptops with Thunderbolt 4, such as recent Dell XPS, Lenovo ThinkPad X1, and HP Spectre models, offer similar multi-display capabilities that rival desktop workstations.
How to Connect Laptop to Monitor Wirelessly
Wireless display technology enables you to connect external monitors to laptops without physical cables using protocols like Miracast, AirPlay, or proprietary wireless display solutions. This approach particularly benefits users who frequently move between presentation spaces, hot-desking environments, or home office setups where cable management presents challenges. Modern wireless display adapters in 2026 support resolutions up to 4K at 60Hz with latency low enough for general productivity work, though wired connections still provide superior performance for gaming or video editing.
For Windows 11 laptops connecting to wireless displays, press Windows key plus K to open the Cast menu, which scans for available wireless displays on your network. Select your target display from the list, and after a brief connection process, your laptop screen will appear on the wireless monitor. Popular wireless display adapters compatible with Windows include Microsoft’s Wireless Display Adapter, Screenbeam Mini4, and Google Chromecast devices. These adapters typically connect to your monitor’s HDMI port and join your Wi-Fi network, appearing as available casting targets.
Setting Up Miracast Connections
Miracast is the standard wireless display protocol for Windows devices, built directly into Windows 10 and Windows 11 without requiring additional software. To verify your laptop supports Miracast, open Command Prompt and type netsh wlan show drivers, then look for Wireless Display Supported: Yes in the output. Some monitors released in 2025 and 2026 include built-in Miracast receivers, eliminating the need for separate adapters. These integrated solutions from manufacturers like Dell, LG, and Samsung provide one-touch wireless connectivity specifically designed for business environments.
When connecting via Miracast, expect initial connection times of five to ten seconds and occasional reconnection prompts if your laptop enters sleep mode. The technology works best with both devices on the same 5GHz Wi-Fi network, as 2.4GHz networks often lack sufficient bandwidth for smooth 1080p or 4K video transmission. For optimal performance, position your laptop within fifteen feet of the wireless display receiver and minimize obstacles between devices, as physical barriers can degrade signal quality and introduce display lag.
AirPlay for Mac Users
Mac users can wirelessly connect to external displays using AirPlay, Apple’s proprietary wireless streaming protocol. AirPlay 2, current as of 2026, supports 4K resolution and audio transmission to compatible displays including Apple TV devices, AirPlay-enabled smart TVs from Samsung, LG, Sony, and Vizio, and dedicated AirPlay receivers. To connect, click the Control Center icon in your Mac’s menu bar, select Screen Mirroring, and choose your target display from the list of available devices.
AirPlay offers superior integration with the Apple ecosystem compared to third-party wireless display solutions, including features like Sidecar that turns iPads into wireless secondary displays for Macs. However, AirPlay requires all devices to exist on the same network and may introduce noticeable latency for activities requiring real-time responsiveness. For professional creative work or gaming, Mac users typically prefer wired USB-C or Thunderbolt connections despite the convenience of wireless alternatives.
How to Connect Two Monitors to a Laptop
Connecting two external monitors to a laptop creates a triple-display setup that maximizes screen real estate for complex workflows involving multiple applications simultaneously. This configuration has become increasingly common among software developers, financial traders, video editors, and data analysts who benefit from having reference materials, communication tools, and primary work applications visible simultaneously without constant window switching.
The technical feasibility of connecting two monitors depends on your laptop’s capabilities, specifically its graphics processor and available video output ports. Most business laptops manufactured in 2024-2026 support at least two external displays through combinations of HDMI, USB-C, and Thunderbolt ports. For example, a laptop with one HDMI port and two USB-C ports with DisplayPort Alt Mode can drive two external monitors by using the HDMI port for one monitor and a USB-C port for the second monitor, while reserving the remaining USB-C port for charging.
Connection Methods for Dual External Monitors
To physically connect two external monitors to your laptop, identify two available video output ports and connect each monitor using appropriate cables. Common configurations include HDMI plus USB-C, dual USB-C connections, or HDMI plus Thunderbolt. After connecting both monitors, access your display settings through Windows Settings or macOS System Preferences to arrange the displays logically. Most operating systems automatically detect both monitors and extend your desktop across all three screens including your laptop display.
For laptops with limited video output ports, USB-C or Thunderbolt docking stations provide expanded connectivity options. These docks typically include multiple HDMI, DisplayPort, or USB-C outputs capable of driving two or more monitors simultaneously while connecting to your laptop through a single Thunderbolt cable. Popular docking stations in 2026 from manufacturers like CalDigit, Anker, and Plugable support dual 4K monitors at 60Hz, meeting the needs of demanding professional users. Prices for quality dual-monitor docks range from one hundred fifty to four hundred dollars across United States retailers.
Configuring Triple Display Arrangements
After connecting two external monitors, proper display arrangement configuration ensures intuitive navigation between screens. In Windows 11 Display settings, you will see three numbered display representations corresponding to your laptop screen and both external monitors. Drag these representations to match your physical desk setup—for instance, if your laptop sits between two monitors, arrange the displays in settings as left monitor, laptop, right monitor from left to right.
Consider designating your primary external monitor as your main display if it offers superior size or resolution compared to your laptop screen, relegating the laptop display to secondary tasks like system monitoring, email, or communication applications. Windows 11’s display identification feature helps clarify which physical monitor corresponds to which number in settings by displaying large numbers on each screen when you click Identify. This feature proves particularly valuable during initial setup when physical and digital arrangements may not obviously align.
How to Get Your Laptop to Recognize an External Monitor
Display detection failures represent the most common frustration users experience when attempting to connect external monitors to laptops. When your laptop fails to recognize a connected monitor, the issue typically stems from incorrect cable connections, outdated graphics drivers, improper input source selection on the monitor, or hardware incompatibilities between devices. Systematic troubleshooting can resolve the majority of recognition problems within minutes.
Begin troubleshooting by verifying physical connections are secure at both ends, ensuring cables are fully inserted into ports without visible gaps. Many HDMI and DisplayPort connections require firm pressure to seat properly, and loose connections frequently cause detection failures. Examine your cable for physical damage including bent pins, frayed shielding, or damaged connectors. If possible, test the monitor with a different device like another laptop or desktop computer to confirm the monitor functions correctly.
Updating Graphics Drivers
Outdated or corrupted graphics drivers cause approximately forty percent of external monitor detection issues according to technical support data from major laptop manufacturers. To update drivers in Windows, right-click the Start button, select Device Manager, expand Display adapters, right-click your graphics card, and select Update driver. Choose Search automatically for drivers to allow Windows to find and install the latest driver version from Microsoft’s servers.
For NVIDIA, AMD, or Intel discrete graphics cards, downloading drivers directly from the manufacturer’s website often provides newer versions than Windows Update offers. NVIDIA users should install GeForce Experience or access nvidia.com/drivers, AMD users should visit amd.com/support, and Intel users can utilize the Intel Driver & Support Assistant. After installing updated drivers, restart your laptop with the external monitor connected and powered on to allow the new drivers to detect displays during system initialization.
Using Windows Display Detection Tools
Windows includes built-in display detection tools that can force the operating system to search for connected monitors. Access these tools by opening Settings, navigating to System and Display, scrolling down to Multiple displays, and clicking the Detect button. This action triggers Windows to rescan all video output ports for connected displays, often successfully detecting monitors that were not automatically recognized during initial connection.
If the Detect button fails to find your monitor, try restarting your laptop with the monitor connected and set as the active input source. Some laptop BIOS configurations only detect external displays during boot sequence, particularly in systems configured for optimal battery conservation. Additionally, pressing Windows key plus P to open the Project menu and cycling through the display mode options (PC screen only, Duplicate, Extend, Second screen only) can sometimes trigger detection of stubborn monitors that resist automatic recognition.
Connecting Dell Monitor to Laptop with HDMI
Dell monitors are among the most popular external display options for United States consumers and businesses, known for reliable compatibility with diverse laptop brands including non-Dell systems. Dell’s UltraSharp, P-Series, and E-Series monitors all include standard HDMI inputs that work seamlessly with Windows laptops, MacBooks, and Chromebooks. The connection process follows standard HDMI procedures regardless of monitor model, though Dell monitors often include additional features like USB hubs and DisplayPort daisy-chaining capabilities.
To connect a Dell monitor to any laptop via HDMI, use a certified HDMI cable rated for your intended resolution and refresh rate. For 4K monitors like the Dell UltraSharp U2723DE or S2722DC, ensure your HDMI cable supports HDMI 2.0 or later, as older HDMI 1.4 cables limit 4K resolution to 30Hz rather than the preferred 60Hz. Connect one cable end to your laptop’s HDMI port and the other to any available HDMI input on your Dell monitor, then power on the monitor and select the correct HDMI input using the monitor’s physical control buttons or joystick.
Dell Display Manager Software
Dell provides Dell Display Manager software free of charge for Windows and macOS users, offering enhanced control over Dell monitor settings directly from your laptop. This application allows you to adjust brightness, contrast, and color presets without using the monitor’s physical buttons, create custom window layouts that automatically arrange applications in predefined screen zones, and configure Picture-by-Picture or Picture-in-Picture modes on supported monitors. Dell Display Manager supports automatic mode switching based on active applications, useful for professionals who switch between color-critical work and standard productivity tasks.
The Easy Arrange feature within Dell Display Manager has become particularly popular among users who frequently work with multiple application windows simultaneously. Easy Arrange provides snap zones that appear when you drag windows, allowing quick positioning of applications in organized tile patterns across your Dell monitor. This functionality resembles Windows 11’s native Snap Layouts but offers Dell-specific enhancements including the ability to save and recall custom layouts, benefiting users who transition between different workflow configurations throughout their workday.
Connecting External Monitor to Laptop Windows 10
Windows 10 remains widely used in 2026, particularly in corporate environments and educational institutions that have not yet migrated to Windows 11. The process of connecting external monitors to Windows 10 laptops differs only slightly from Windows 11, with the primary distinctions appearing in the display settings interface rather than fundamental functionality. Windows 10 supports all standard connection methods including HDMI, DisplayPort, USB-C, and wireless displays through Miracast.
To configure an external monitor in Windows 10, right-click on the desktop and select Display settings, or press Windows key plus I to open Settings, then navigate to System and Display. The display settings interface shows numbered representations of connected monitors arranged horizontally. Click the Identify button to display numbers on each physical screen, helping you determine which settings apply to which monitor. Use the Multiple displays dropdown menu to select Extend desktop, Duplicate desktop, or use only one display based on your preferences.
Windows 10 Display Scaling
Display scaling in Windows 10 allows you to adjust the size of text, applications, and interface elements independently for each connected monitor. This feature addresses the challenge of using monitors with significantly different pixel densities, such as a 4K external monitor paired with a 1080p laptop display. Windows 10 recommends scaling percentages based on each display’s specifications, typically suggesting 100% for 1080p displays and 150-200% for 4K displays depending on screen size.
Users can customize scaling beyond recommended values by selecting a display in settings and adjusting the scale slider under Scale and layout. However, custom scaling values sometimes cause blurry text in certain applications, particularly older programs not optimized for high-DPI displays. Windows 10’s scaling algorithms have improved significantly through updates, but some compatibility issues persist with legacy software that assumes traditional screen resolutions. For the best experience, maintain recommended scaling values unless specific workflow requirements demand customization.
Common Cable Types and Compatibility
Understanding display cable types and their capabilities ensures you select appropriate connections for your specific laptop and monitor combination. The primary cable types available in 2026 include HDMI, DisplayPort, USB-C, Thunderbolt, and legacy options like DVI and VGA. Each cable type offers different maximum resolutions, refresh rates, and additional features like audio transmission or power delivery that influence their suitability for various use cases.
HDMI Cable Specifications
HDMI cables exist in several versions with varying capabilities. HDMI 1.4 supports up to 4K resolution at 30Hz, suitable for basic productivity but insufficient for smooth motion in gaming or video playback. HDMI 2.0 increased bandwidth to support 4K at 60Hz, becoming the minimum standard for modern 4K monitors. HDMI 2.1, introduced in 2017 and widely adopted by 2024, supports 8K resolution at 60Hz, 4K at 120Hz, and includes features like Variable Refresh Rate and Auto Low Latency Mode beneficial for gaming. When purchasing HDMI cables in 2026, verify HDMI 2.0 certification at minimum for 4K displays or HDMI 2.1 for high-refresh-rate gaming monitors.
All HDMI cables transmit audio along with video, eliminating the need for separate audio cables when connecting monitors with built-in speakers. This convenience makes HDMI the preferred consumer connection type, though professional users often choose DisplayPort for its superior bandwidth and multi-stream transport capabilities. HDMI cables are available in lengths from three feet to fifty feet, though signal degradation can occur beyond fifteen feet without active signal amplification. For most desk setups, six-foot HDMI cables provide adequate length without excess cable management challenges.
DisplayPort and USB-C Alternatives
DisplayPort cables offer technical advantages over HDMI, particularly for professional applications requiring multiple monitors from a single connection. DisplayPort 1.4, current as of 2026, supports 8K at 60Hz or 4K at 120Hz similar to HDMI 2.1, but includes Multi-Stream Transport that enables daisy-chaining multiple monitors. DisplayPort 2.0, gradually appearing in high-end monitors and laptops, provides bandwidth for 16K displays or multiple 8K monitors simultaneously, though content creation demands rarely require such extreme resolutions.
USB-C cables with DisplayPort Alt Mode combine video transmission, data transfer, and power delivery in a single reversible connector. This convergence reduces cable clutter and simplifies connection procedures, particularly valuable for laptop users who frequently move between locations. When purchasing USB-C cables for display connections, verify they support video transmission, as some USB-C cables only support data and power. Quality USB-C cables certified for 4K 60Hz video transmission typically cost between twenty and forty dollars for six-foot lengths at United States retailers, while Thunderbolt-certified cables supporting 40 Gbps bandwidth command premium prices of forty to seventy dollars.
Optimizing Display Settings for Different Use Cases
Different professional and personal use cases benefit from specific display configurations and settings tailored to optimize visual quality, color accuracy, or performance characteristics. Productivity users prioritize screen real estate and comfortable viewing angles, creative professionals require accurate color reproduction and high resolution, while gamers need fast response times and high refresh rates. Understanding how to configure display settings for your specific needs maximizes the value of your external monitor investment.
Settings for Productivity Work
For general productivity work including document editing, spreadsheets, email, and web browsing, prioritize comfortable scaling that prevents eye strain from excessively small text. Set your external monitor to its native resolution to ensure maximum sharpness, then adjust scaling to maintain readable text sizes. Most productivity users find 150% scaling optimal for 27-inch 4K monitors positioned at standard desk viewing distances of twenty-four to thirty inches. Enable blue light filtering through Windows Night Light or macOS Night Shift during evening hours to reduce eye fatigue from prolonged screen exposure.
Productivity-focused users should configure extended display mode rather than mirrored displays, dedicating the larger external monitor to primary applications while using the laptop screen for secondary tasks like communication tools, system monitoring, or reference materials. Windows 11’s Snap Layouts and macOS’s Stage Manager features enhance productivity on extended displays by organizing windows into logical arrangements that reduce time spent manually positioning applications. According to workplace productivity studies, properly configured dual-monitor setups improve task completion speed by approximately twenty to thirty percent compared to single-screen configurations.
Settings for Creative Professional Work
Creative professionals working in photography, video editing, or graphic design require color-accurate displays calibrated to industry standards. After connecting your external monitor, use hardware calibration tools like X-Rite i1Display Pro or Datacolor SpyderX to profile your monitor and ensure accurate color reproduction. Professional-grade monitors from Dell UltraSharp, BenQ SW series, or EIZO ColorEdge lines include factory calibration reports and support hardware LUT calibration for precise color management required in professional workflows.
Set your creative work monitor to its native resolution and use 100% scaling whenever possible to view images and videos at their true pixel dimensions without interpolation. Enable HDR mode if your monitor and laptop support it and your workflow includes HDR content creation. Configure color space settings to match your delivery requirements—sRGB for web content, Adobe RGB for print work, or DCI-P3 for video production. Many professional creative applications including Adobe Photoshop, Premiere Pro, and DaVinci Resolve support color management profiles that adapt to your monitor’s calibrated characteristics, ensuring what you see on screen accurately represents final output across different devices and media.
Settings for Gaming
Gaming on external monitors connected to laptops requires attention to refresh rate, response time, and adaptive sync technologies. After connecting your gaming monitor, verify that Windows or macOS recognizes and enables the maximum supported refresh rate—typically 144Hz, 165Hz, or 240Hz for gaming-oriented displays. In Windows 11, access Display settings, click Advanced display, and confirm the refresh rate matches your monitor’s specifications. Many systems default to 60Hz even when connected to high-refresh-rate monitors, negating the smoothness advantage these displays provide.
Enable NVIDIA G-SYNC or AMD FreeSync if your monitor and laptop graphics card support these adaptive sync technologies, which eliminate screen tearing and stuttering during gameplay. G-SYNC and FreeSync require specific configuration in NVIDIA Control Panel or AMD Radeon Settings respectively. Gaming monitors in 2026 increasingly support both technologies simultaneously through VESA’s Adaptive-Sync standard, ensuring compatibility regardless of your laptop’s graphics hardware. For competitive gaming where response time matters, disable any image processing features in your monitor’s settings menu, as these introduce display lag that can negatively impact gameplay responsiveness in fast-paced titles.
Related video about how to connect external monitor to laptop
This video complements the article information with a practical visual demonstration.
Your questions answered
How do I get my laptop to recognize my external monitor?
To get your laptop to recognize an external monitor, first ensure all cables are securely connected at both ends and the monitor is powered on with the correct input source selected. Update your graphics drivers through Device Manager in Windows or System Preferences on Mac. Press Windows key plus P and cycle through display modes, or navigate to Display settings and click the Detect button to force Windows to search for connected displays. If the monitor remains undetected, restart your laptop with the monitor connected and powered on, as some systems only detect external displays during boot. Verify your cable supports video transmission, particularly for USB-C connections where some cables only support data and power.
Can I connect two monitors to my laptop and use all three screens?
Yes, most modern laptops support connecting two external monitors simultaneously, creating a triple-display setup with your laptop screen. Check your laptop’s specifications to verify it supports multiple external displays—most business laptops from 2024-2026 include this capability. Connect each external monitor using available video ports such as HDMI, USB-C, or DisplayPort. If your laptop has limited ports, use a USB-C or Thunderbolt docking station that provides multiple display outputs. After connecting both monitors, configure them in Display settings to extend your desktop across all three screens. Arrange the displays in settings to match their physical positions on your desk for intuitive navigation between screens.
What cable do I need to connect my laptop to an external monitor?
The cable you need depends on the available ports on your laptop and monitor. Most modern connections use HDMI, USB-C, or DisplayPort cables. Check your laptop’s side or rear panel for HDMI ports (rectangular with one side angled), USB-C ports (small oval reversible connector), or DisplayPort outputs (rectangular with one corner chamfered). Match this to your monitor’s input ports. For 4K displays, ensure your HDMI cable supports HDMI 2.0 or later for 60Hz refresh rates. USB-C cables must specifically support video transmission through DisplayPort Alt Mode, as some USB-C cables only carry data and power. Quality cables certified for your intended resolution typically cost twenty to forty dollars at United States electronics retailers.
How do I connect my laptop to a monitor wirelessly?
To connect your laptop to a monitor wirelessly, you need a wireless display adapter or a monitor with built-in wireless display support. For Windows laptops, press Windows key plus K to open the Cast menu and select your wireless display from available devices. Ensure both your laptop and wireless display adapter are connected to the same Wi-Fi network, preferably 5GHz for better performance. Popular wireless display solutions include Microsoft Wireless Display Adapter, Screenbeam devices, and Google Chromecast. Mac users can use AirPlay by clicking Screen Mirroring in Control Center and selecting an AirPlay-compatible device. Wireless connections work well for productivity tasks but may introduce latency unsuitable for gaming or video editing.
Why does my external monitor display a blurry image when connected to my laptop?
Blurry images on external monitors typically result from incorrect resolution settings or improper display scaling. Ensure your monitor is set to its native resolution in Display settings—for example, 1920×1080 for Full HD monitors or 3840×2160 for 4K displays. Running monitors at non-native resolutions causes image scaling that produces blurriness. Check that your display scaling percentage is appropriate for your monitor size and resolution—Windows recommends specific scaling values based on pixel density. If using older applications, Windows DPI scaling compatibility settings may need adjustment. In Display settings, select your monitor, scroll to Scale and layout, and verify both resolution and scaling match recommended values for optimal clarity.
Do I need to install drivers to use an external monitor with my laptop?
Modern operating systems include generic display drivers that automatically recognize and support most external monitors without additional driver installation. Windows 10, Windows 11, and macOS will typically detect and configure external monitors immediately upon connection. However, updating your laptop’s graphics drivers can resolve detection issues and enable advanced features. For integrated Intel, AMD, or NVIDIA graphics, download the latest drivers from the manufacturer’s website or use Windows Update. Some professional monitors offer optional software like Dell Display Manager or LG OnScreen Control that provides enhanced functionality beyond basic display settings, but these utilities are not required for standard monitor operation.
| Connection Method | Maximum Resolution | Best Use Case |
|---|---|---|
| HDMI 2.1 | 8K at 60Hz / 4K at 120Hz | Universal compatibility for productivity and gaming |
| USB-C DisplayPort Alt Mode | 8K at 60Hz with DSC | Single-cable solution with power delivery |
| Thunderbolt 4 | Dual 4K or Single 8K | Professional multi-monitor setups and docking |
| DisplayPort 1.4 | 8K at 60Hz / 4K at 120Hz | Daisy-chaining multiple monitors |
| Wireless (Miracast/AirPlay) | 4K at 60Hz | Cable-free presentations and flexible workspaces |