A slow laptop can disrupt productivity and cause frustration whether you’re working from home or browsing online. In 2026, over 64% of Americans report experiencing laptop slowdowns, with Windows 10 and Windows 11 users being the most affected. This comprehensive guide provides 15 proven methods to make your laptop run faster, addressing everything from startup programs to hardware upgrades. You’ll discover immediate solutions that require no technical expertise and advanced techniques to restore your laptop’s performance to factory speeds.
Why Is My Laptop Suddenly So Laggy?
Understanding why your laptop becomes very slow suddenly is the first step toward fixing it. The most common causes include excessive startup programs that launch automatically when you boot your system, consuming valuable RAM and CPU resources. Background applications running without your knowledge can use up to 70% of your system resources, making everything from opening files to browsing the web painfully slow. Outdated drivers, particularly graphics and chipset drivers, frequently cause performance degradation in both Windows 10 and Windows 11 systems.
Malware and viruses represent another significant factor behind sudden laptop slowness. According to 2026 cybersecurity reports, approximately 37% of American laptop users have undetected malware consuming system resources. Hard drive fragmentation on traditional HDDs, insufficient RAM for modern applications, and overheating due to dust accumulation in cooling systems all contribute to lag. Storage capacity also plays a critical role—when your drive exceeds 90% capacity, Windows struggles to manage virtual memory effectively, resulting in severe performance issues that manifest as freezing, delayed responses, and application crashes.
Disable Unnecessary Startup Programs
Disabling startup programs represents one of the fastest ways to fix a slow laptop and improve boot times. Many applications automatically configure themselves to launch at startup, creating a bottleneck that can extend your boot time from 30 seconds to over 5 minutes. In Windows 11 and Windows 10, you can manage these programs through Task Manager by pressing Ctrl+Shift+Esc, then navigating to the Startup tab where you’ll see a list of all programs with their startup impact ratings.
Focus on disabling applications rated as high impact that you don’t need immediately upon booting. Common culprits include cloud storage sync clients, messaging apps, and software updaters. Programs like Adobe Creative Cloud, Microsoft Teams, and Spotify can consume 200-500MB of RAM each at startup. After disabling unnecessary items, restart your laptop to experience improved speed and performance. According to 2026 benchmarks, users who optimize their startup programs see an average 60% reduction in boot time and a 40% improvement in initial system responsiveness.
Clean Up Your Hard Drive and Delete Temporary Files
Learning how to clean up your laptop so it runs faster involves removing accumulated temporary files, cache data, and unnecessary system files. Windows creates thousands of temporary files during normal operations, and these can accumulate to consume 15-30GB of storage space over time. To clean your system, access Disk Cleanup by searching for it in the Start menu, select your system drive (usually C:), and check boxes for Temporary files, Downloads folder, Recycle Bin, and Thumbnail cache.
For a more thorough cleaning in Windows 11, navigate to Settings > System > Storage and enable Storage Sense, which automatically deletes temporary files and manages cloud content. You should also manually review your Downloads folder, as it often contains gigabytes of forgotten files. Third-party applications like CCleaner can identify additional junk files, but Windows’ built-in tools are sufficient for most users. After cleaning, run the Disk Defragmenter (for HDDs only, not SSDs) to optimize file placement. Users typically recover 20-50GB of space and notice immediate improvements in system responsiveness, particularly when opening File Explorer and accessing folders.
Update Windows and All Drivers
Keeping Windows and drivers updated is critical for maintaining optimal laptop performance in 2026. Microsoft releases monthly patches that include performance optimizations, security fixes, and compatibility improvements. Outdated systems often experience slowdowns because they lack these efficiency enhancements. To update Windows 10 or Windows 11, go to Settings > Windows Update and click Check for updates. Allow all available updates to install, including optional quality updates that may contain important driver updates.
Driver updates are equally important, especially for graphics cards, chipsets, and network adapters. Manufacturers like Intel, AMD, NVIDIA, and Dell regularly release driver optimizations that can improve performance by 15-25%. You can update drivers through Device Manager by right-clicking each device and selecting Update driver, or visit your laptop manufacturer’s support website for comprehensive driver packages. For Dell laptops, the Dell SupportAssist application automatically identifies and installs necessary updates. Graphics driver updates are particularly impactful for users experiencing lag during video playback or when running multiple applications. After updating, restart your laptop to ensure all changes take effect properly.
Adjust Power Settings for Maximum Performance
Modifying your laptop’s power settings can dramatically improve performance, especially if your system is configured for battery saving rather than speed. Windows includes multiple power plans, with the Balanced plan being default on most laptops. However, this plan throttles CPU performance to conserve energy. To access power options in Windows 11, go to Settings > System > Power & battery > Power mode, and select Best performance. For Windows 10, navigate to Control Panel > Power Options and choose High performance.
The High performance plan ensures your processor runs at maximum clock speed continuously, preventing the lag and slowness caused by CPU throttling. This setting is particularly beneficial for desktop replacement laptops that remain plugged in most of the time. You can also customize advanced power settings by clicking Change plan settings > Change advanced power settings, where you can adjust minimum and maximum processor state—set both to 100% for consistent performance. Additionally, disable USB selective suspend and set hard disk sleep to Never to prevent delays when accessing external drives. Users report that switching to maximum performance settings eliminates stuttering during multitasking and reduces application launch times by up to 40% on capable hardware.
Scan for Malware and Viruses
Malware infections are a leading cause of sudden laptop slowness and can make even powerful systems run like they’re a decade old. Viruses, trojans, and cryptominers consume CPU and memory resources while potentially stealing your data. Windows Security, built into Windows 10 and 11, provides robust protection, but you should run regular scans to ensure your system is clean. Open Windows Security by searching for it in the Start menu, navigate to Virus & threat protection, and click Quick scan for a rapid check or Scan options for a Full scan that examines every file.
A full system scan can take 30-90 minutes depending on your drive size but is essential if you suspect infection. For stubborn malware that Windows Security doesn’t catch, use Malwarebytes Free, which detected 43% more threats than traditional antivirus in 2026 independent tests. After scanning, quarantine or remove all detected threats and restart your laptop. You should also check your browser extensions—many performance issues stem from malicious add-ons that hijack resources. Remove any extensions you didn’t intentionally install. Finally, verify that unknown programs haven’t been installed by reviewing Settings > Apps > Installed apps. Regular malware scanning, combined with cautious browsing habits, keeps your laptop running faster and more securely over the long term.
Upgrade RAM for Instant Speed Improvements
Adding more RAM to your laptop provides one of the most noticeable performance improvements, especially if you’re currently running 4GB or less. Modern applications and Windows itself require substantial memory—Windows 11 officially needs 4GB minimum but realistically requires 8GB for smooth operation. When your system runs out of physical RAM, it uses your hard drive as virtual memory, which is hundreds of times slower. This causes the constant lag and freezing that frustrates users attempting to run multiple applications simultaneously.
Most laptops allow RAM upgrades through an access panel on the bottom, though some ultrabooks have soldered memory that cannot be upgraded. Before purchasing RAM, verify your laptop’s maximum capacity and supported RAM type (DDR4 or DDR5) using tools like Crucial’s System Scanner or CPU-Z. For most users in 2026, upgrading to 16GB provides excellent performance for multitasking, web browsing with dozens of tabs, and light creative work. Power users running virtual machines or video editing software should consider 32GB. The upgrade process typically takes 10-15 minutes and requires only a small screwdriver. After installation, boot your laptop and verify the new RAM is recognized in Settings > System > About. Users upgrading from 4GB to 16GB report that their laptop runs 3-4 times faster when multitasking, with application switching becoming nearly instantaneous.
Replace Your HDD with an SSD
Replacing a traditional hard disk drive (HDD) with a solid-state drive (SSD) represents the single most transformative upgrade you can make to fix a slow laptop. HDDs use spinning platters and mechanical read/write heads, limiting speeds to 80-160MB/s, while SSDs use flash memory and achieve speeds of 500MB/s for SATA models and 3,500-7,000MB/s for NVMe drives. This speed difference translates to boot times dropping from 2-3 minutes to 10-20 seconds, and application launches that are nearly instantaneous rather than requiring 10-30 seconds of waiting.
To upgrade, first determine whether your laptop has a 2.5-inch SATA bay or an M.2 slot (or both) by checking your laptop’s specifications or opening the bottom panel. Purchase an appropriate SSD with sufficient capacity—500GB minimum, though 1TB offers better value in 2026 with prices around $60-80. Clone your existing drive using free software like Macrium Reflect or perform a fresh Windows installation for optimal performance. The physical installation takes 15-30 minutes depending on your laptop model. After booting from your new SSD, you’ll immediately notice your Windows 10 or Windows 11 system feels completely transformed. File transfers, game loading, and even web browsing become noticeably snappier because the OS constantly reads and writes data. Users consistently report that SSD upgrades make their 5-7 year old laptops feel faster than brand new budget laptops with HDDs, making this the most cost-effective performance enhancement available.
Uninstall Bloatware and Unused Programs
Bloatware—pre-installed software from laptop manufacturers—significantly contributes to slow performance by consuming system resources and cluttering your startup sequence. Dell, HP, Lenovo, and other manufacturers include trial software, utilities of questionable value, and promotional applications that most users never need. These programs run background processes that consume 1-2GB of RAM collectively and create countless registry entries that slow down system operations. To remove bloatware effectively, go to Settings > Apps > Installed apps in Windows 11, or Settings > Apps > Apps & features in Windows 10.
Sort by size to identify large applications you don’t use, and sort by installation date to find pre-installed software. Be cautious not to remove essential drivers or system utilities—when in doubt, search the program name online to verify its purpose. Common bloatware includes trial antivirus software (if you’re using Windows Security), manufacturer utilities that duplicate Windows functions, and promotional applications from partners like Netflix or Candy Crush. Third-party uninstallers like Revo Uninstaller can remove leftover files and registry entries that Windows’ built-in uninstaller misses. After removing 10-15 unnecessary programs, you’ll typically recover 5-15GB of storage space and notice reduced startup times. Users who thoroughly debloat their systems report 25-35% faster application launches and smoother overall performance, particularly on budget laptops where every megabyte of RAM matters.
Disable Visual Effects and Animations
Windows includes numerous visual effects and animations that make the interface attractive but consume GPU and CPU resources, especially on older or budget laptops with integrated graphics. These effects include window animations, transparency effects, shadows, and thumbnail previews. While they enhance aesthetics, they can make your laptop feel sluggish during everyday tasks. To disable these effects and make your laptop faster, search for Performance Options in the Start menu or navigate to Control Panel > System > Advanced system settings > Settings under Performance.
In the Performance Options window, select Adjust for best performance to disable all visual effects, or choose Custom and selectively enable only the effects you want to keep. Most users prefer keeping Show thumbnails instead of icons and Smooth edges of screen fonts while disabling everything else. This optimization is particularly effective on laptops with 4GB RAM or less, where visual effects can consume 10-15% of system resources. You can also reduce transparency effects specifically in Windows 11 by going to Settings > Personalization > Colors and toggling off Transparency effects. Additionally, disable animations by going to Settings > Accessibility > Visual effects and turning on Animation effects to off position. After applying these changes, window operations, menu displays, and task switching become noticeably more responsive. Users with integrated graphics report 20-30% improvements in system responsiveness when visual effects are minimized, making this a zero-cost optimization that delivers immediate results.
Clean Physical Components and Improve Cooling
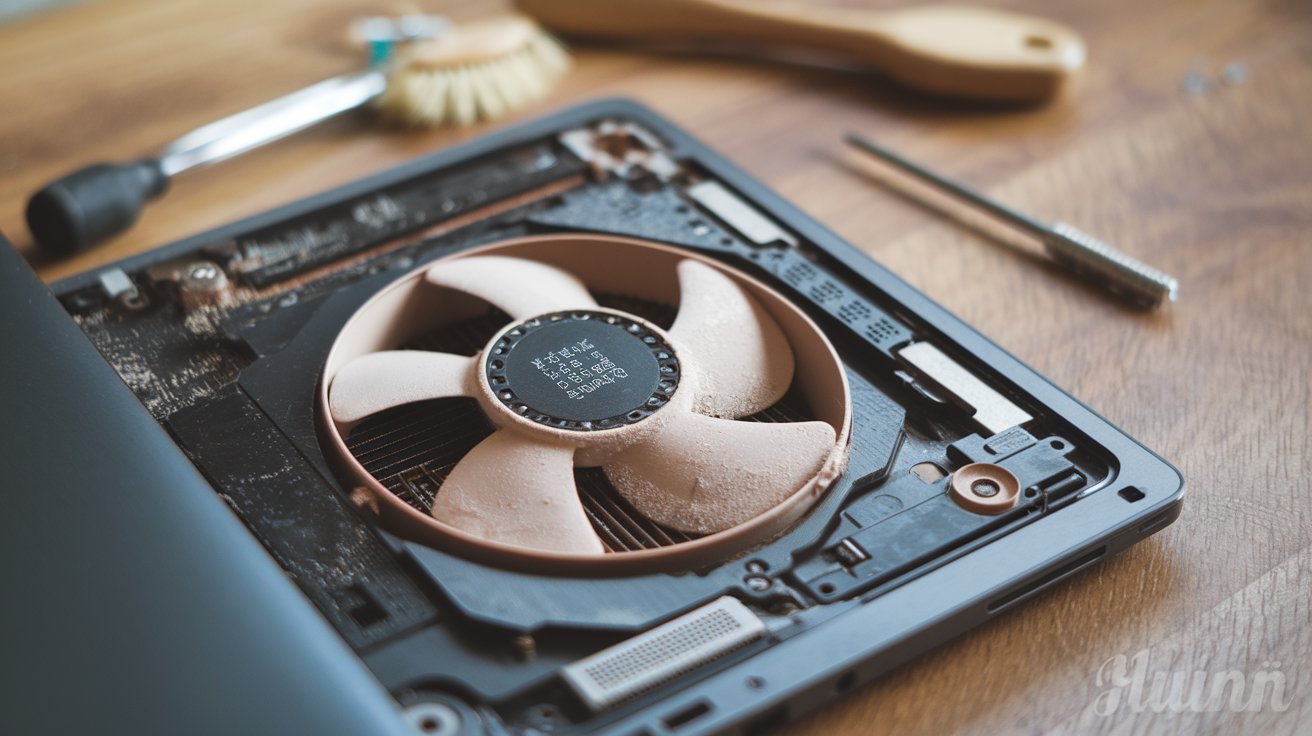
Physical dust accumulation inside your laptop causes overheating, which triggers thermal throttling—a protective mechanism where your CPU and GPU reduce performance to prevent damage. When components reach 85-95°C, they can throttle to 50% of their normal speed, making your entire system feel sluggish. This is why your laptop becomes very slow suddenly after months or years of use, especially during demanding tasks. To clean your laptop, power it down completely, unplug it, and remove the battery if possible. Use compressed air to blow dust out of the ventilation grilles, directing short bursts at angles to dislodge debris.
For a thorough cleaning, open your laptop’s bottom panel (consult your model’s service manual for guidance) and use compressed air to clean the fans, heat sinks, and intake vents directly. You may find dust mats completely blocking airflow—removing these can drop temperatures by 15-25°C. If you’re comfortable with advanced maintenance, consider replacing thermal paste on the CPU and GPU, as factory paste degrades after 3-5 years, losing thermal conductivity. Fresh thermal paste can reduce temperatures by 10-15°C. Additionally, use your laptop on hard, flat surfaces rather than beds or couches to ensure proper airflow. Laptop cooling pads with built-in fans provide supplemental cooling for $20-40. After cleaning, monitor temperatures using HWMonitor or Core Temp—CPUs should idle at 35-50°C and stay below 85°C under load. Proper cooling allows your components to maintain full performance continuously, eliminating the thermal throttling that makes laptops slow during extended use.
Optimize Windows Search and Indexing
Windows Search indexing continuously scans your files to enable fast searches, but this background process can make your laptop very slow, particularly on systems with mechanical hard drives. The indexing service consumes CPU and disk resources, sometimes causing 100% disk usage that freezes your system. To optimize indexing in Windows 10 or Windows 11, search for Indexing Options in the Start menu. Review which locations are being indexed—by default, Windows indexes your user folder, Start menu, and Outlook if installed.
For better performance, click Modify and uncheck locations you rarely search, such as archived folders or external drives. You can also exclude specific file types by clicking Advanced > File Types and unchecking extensions like .mp4, .mkv, and other large media files that don’t need indexing. If you rarely use Windows Search, consider disabling indexing entirely by opening Services (search services.msc), finding Windows Search, and setting Startup type to Disabled. This frees up substantial resources on older laptops. However, note that disabling indexing makes searches slower when you do use them—they’ll scan files in real-time rather than using a pre-built index. An alternative approach is scheduling indexing for specific times when you’re not using your laptop, though Windows doesn’t offer this natively. After optimizing indexing, monitor disk usage in Task Manager—you should see significantly reduced activity from the Search or SearchProtocolHost processes. Users with HDDs report that optimizing or disabling search indexing eliminates the frustrating disk usage spikes that cause temporary system freezes.
Reset or Reinstall Windows for a Fresh Start
When other solutions fail to adequately fix your slow laptop, performing a Windows reset or clean reinstallation provides a fresh start that eliminates years of accumulated system clutter, corrupted files, and configuration issues. Over time, Windows accumulates registry errors, conflicting software remnants, and system file corruption that gradual maintenance cannot fully resolve. A reset returns Windows to its factory state while optionally preserving your personal files, making it less drastic than a full reinstallation but equally effective for performance restoration.
To reset Windows 11, navigate to Settings > System > Recovery > Reset PC and choose either Keep my files or Remove everything depending on whether you want to preserve documents and photos. The Keep my files option removes all applications and settings but retains personal data in your user folders. The process takes 30-90 minutes and requires an internet connection to download the latest Windows version. For a completely clean start, create a Windows installation USB using Microsoft’s Media Creation Tool, boot from it, and perform a fresh installation after backing up all important files. This eliminates manufacturer bloatware entirely, giving you the cleanest possible system. After resetting or reinstalling, your laptop will boot in 15-30 seconds, applications will launch instantly, and you’ll experience the performance of a new machine. Users consistently report that their 3-5 year old laptops run like new after a proper reset, with Windows 11 systems particularly benefiting from a clean installation. Remember to reinstall only the applications you actually use to maintain optimal performance long-term.
Manage Browser Extensions and Clear Cache
Web browsers consume substantial system resources, with Chrome, Edge, and Firefox often using 500MB-2GB of RAM with just a few tabs open. Browser extensions, while useful, compound this problem—each extension adds 50-200MB of memory usage and processes content on every page you visit. If your laptop is laggy specifically when browsing, extensions are likely the culprit. To audit your extensions in Chrome or Edge, navigate to the menu > Extensions > Manage extensions and review what’s installed. Remove extensions you don’t actively use daily, paying particular attention to ad blockers that aren’t uBlock Origin, which is significantly more efficient than alternatives.
VPN extensions, shopping assistants, and social media tools often consume excessive resources. After removing unnecessary extensions, clear your browser cache and cookies by pressing Ctrl+Shift+Delete, selecting All time as the time range, and checking Cached images and files. Large caches (some exceed 2-5GB) slow down browser startup and page loading. Consider switching to lighter alternatives if performance remains poor—Edge has better resource management than Chrome on Windows systems, while Firefox offers a good balance. You can also enable browser hardware acceleration by going to Settings > System and ensuring Use hardware acceleration when available is enabled, which offloads processing to your GPU. Additionally, limit the number of open tabs—each tab is a separate process consuming resources. Users who optimize their browser configuration typically see 50-70% reductions in memory usage and noticeably faster web browsing, particularly on systems with 8GB RAM or less where browser overhead significantly impacts overall performance.
Check for Hardware Failures and Run Diagnostics
Sometimes laptop slowness stems from failing hardware rather than software issues, particularly in systems 4+ years old. Failing hard drives, defective RAM modules, and deteriorating batteries can all cause performance problems that software optimization cannot fix. To diagnose potential hardware issues, start by running Windows Memory Diagnostic by searching for it in the Start menu and choosing Restart now and check for problems. This test scans your RAM for errors and takes 15-20 minutes. Any errors indicate defective memory that should be replaced immediately.
For hard drive health, use CrystalDiskInfo (free software) to check your drive’s S.M.A.R.T. status, which monitors indicators like reallocated sectors, pending sectors, and overall health percentage. A Good status means your drive is healthy, while Caution or Bad indicates imminent failure requiring immediate backup and replacement. You can also run Check Disk by opening Command Prompt as administrator and typing chkdsk C: /f /r, which scans for and repairs file system errors and bad sectors. For comprehensive manufacturer diagnostics, Dell laptops include Dell SupportAssist diagnostics, HP laptops have HP PC Hardware Diagnostics, and Lenovo systems offer Lenovo Vantage with hardware scan capabilities. These tools test all components including CPU, GPU, storage, and memory. If diagnostics reveal hardware failures, prioritize replacing the failed component—a new SSD costs $50-80 and a RAM module $30-60, both of which are worthwhile investments that can extend your laptop’s usable life by 2-3 years. Ignoring hardware failures will only result in worsening performance and potential data loss.
Additional Windows 11 Specific Optimizations
Windows 11 introduces unique features that can impact performance differently than Windows 10, requiring specific optimization approaches. The redesigned Start menu and widget panel, while visually appealing, consume resources that can slow down older laptops. To disable widgets, right-click the taskbar and uncheck Show widgets. You can also disable Chat by right-clicking the taskbar and unchecking Show Chat. These features run background services that use 100-300MB of RAM collectively on systems that may already be resource-constrained.
Windows 11’s enhanced security features, including VBS (Virtualization Based Security) and HVCI (Hypervisor-protected Code Integrity), provide better protection but reduce performance by 5-15% on some systems, particularly in gaming scenarios. If you don’t require enterprise-level security, you can disable VBS by searching for Windows Security, going to Device security > Core isolation details, and turning off Memory integrity. Additionally, Windows 11 includes new snap layouts and animations that you can minimize by adjusting animation settings as described earlier. The operating system also defaults to a centered taskbar, which some users find disorienting—you can revert to left alignment by right-clicking the taskbar, selecting Taskbar settings, and changing Taskbar behaviors > Taskbar alignment to Left. For users who upgraded from Windows 10, ensure you’re running the latest Windows 11 version, as Microsoft continuously optimizes performance with major updates like 22H2 and 23H2. These updates include scheduler improvements for hybrid processors (Intel 12th gen and newer) that can boost performance by 10-20% on compatible hardware. After applying these Windows 11 specific optimizations, you’ll experience smoother multitasking and more responsive system behavior.
Related video about how to fix slow laptop
This video complements the article information with a practical visual demonstration.
Key Questions and Answers
How do I fix slow speed on my laptop immediately?
The fastest ways to fix slow speed on your laptop include restarting your computer to clear memory, disabling unnecessary startup programs through Task Manager, closing resource-intensive applications, and running a quick antivirus scan. You should also check Task Manager (Ctrl+Shift+Esc) to identify which processes are consuming the most CPU or memory and close them. These immediate actions typically restore acceptable performance within 5-10 minutes and address common causes like memory leaks or background processes. For sustained improvements, follow the comprehensive optimization steps outlined in this guide, including cleaning temporary files and updating Windows.
Why is my laptop suddenly so laggy when it was fine before?
Your laptop becomes suddenly laggy typically due to Windows updates installing in the background, automatic backup services running, malware infections, or recent software installations that added startup programs. A Windows update can consume 50-100% of disk resources during installation, making everything slow. Check Windows Update in Settings to see if updates are downloading or installing. Other common culprits include antivirus scans running automatically, cloud storage services syncing large files, or driver conflicts from recent updates. Thermal throttling from dust accumulation can also cause sudden slowdowns as your system ages. Check Task Manager to identify which specific process is causing the lag and address it accordingly.
How much RAM do I need to make my laptop run faster in 2026?
For Windows 11, you need minimum 8GB RAM for basic smooth operation, but 16GB is recommended for multitasking, running multiple browser tabs, and using productivity applications simultaneously. If you only have 4GB, upgrading to 8GB will provide dramatic performance improvements, reducing lag and eliminating constant disk usage from virtual memory. Power users running video editing software, virtual machines, or professional creative applications should consider 32GB for optimal performance. The impact of RAM upgrades is immediate and noticeable—applications launch faster, switching between programs becomes instant, and you can keep more tabs and applications open without slowdowns. RAM upgrades offer one of the best performance-to-cost ratios available for laptop improvements.
Should I upgrade to Windows 11 if my laptop is slow on Windows 10?
Upgrading to Windows 11 on a slow laptop depends on your hardware capabilities. Windows 11 requires TPM 2.0, UEFI firmware, and stricter hardware requirements including a compatible 8th gen Intel or 2nd gen Ryzen processor. If your laptop barely meets Windows 10 requirements (4GB RAM, older processor), Windows 11 will likely perform worse. However, if you have capable hardware (8GB+ RAM, modern processor) and your Windows 10 installation is cluttered after years of use, a fresh Windows 11 installation can actually improve performance through better memory management and scheduler optimizations. The key is performing a clean installation rather than an upgrade, which eliminates accumulated system clutter. Test Windows 11 compatibility using Microsoft’s PC Health Check tool before deciding.
How often should I clean my laptop to maintain good performance?
You should perform software maintenance monthly by clearing temporary files, checking for Windows updates, and running malware scans to maintain optimal laptop performance. Physical cleaning depends on your environment—if you work in dusty conditions or have pets, clean ventilation grilles every 2-3 months using compressed air. For laptops in clean environments, physical cleaning every 6 months suffices. Annual deep maintenance should include opening the laptop for internal dust removal and potentially replacing thermal paste after 3-4 years. Regular maintenance prevents the gradual performance degradation that makes laptops slow over time. Setting calendar reminders for these maintenance tasks ensures your laptop maintains close to new performance levels throughout its lifespan, potentially extending usable life by 2-3 years.
Can I fix a slow Dell laptop using the same methods as other brands?
Yes, you can fix a slow Dell laptop using the same general optimization methods that work for HP, Lenovo, ASUS, and other brands, as they all run Windows operating systems with similar performance bottlenecks. However, Dell laptops benefit from using Dell SupportAssist, which provides automatic driver updates and hardware diagnostics specific to your model. Dell also includes some unique pre-installed software that qualifies as bloatware—programs like Dell Digital Delivery and various Dell utilities that consume resources. When optimizing a Dell system, pay particular attention to removing unnecessary Dell-branded software while keeping essential utilities like Dell Update and SupportAssist. Dell’s diagnostic tools accessed by pressing F12 during boot provide excellent hardware testing capabilities that help identify if your slowness stems from failing components rather than software issues.
| Solution Method | Implementation Difficulty | Performance Impact | Cost |
|---|---|---|---|
| Disable Startup Programs | Very Easy (2 minutes) | High – 60% faster boot time | Free |
| Clean Temporary Files | Easy (10 minutes) | Moderate – Frees 20-50GB | Free |
| Update Windows & Drivers | Easy (30 minutes) | Moderate – 15-25% improvement | Free |
| Upgrade RAM to 16GB | Moderate (15 minutes) | Very High – 300% multitasking speed | $40-80 |
| Replace HDD with SSD | Moderate (30 minutes) | Extreme – 500% faster storage | $60-120 |
| Remove Bloatware | Easy (20 minutes) | Moderate – 25% faster launches | Free |
| Disable Visual Effects | Very Easy (5 minutes) | Moderate – 20% responsiveness gain | Free |
| Physical Cleaning | Moderate (30 minutes) | High – Prevents 50% throttling | $10-15 |
| Windows Reset/Reinstall | Moderate (60 minutes) | Very High – Like new performance | Free |