A dusty laptop fan can reduce performance by up to 40% and increase temperatures to dangerous levels. Cleaning your laptop fan is essential maintenance that prevents overheating, extends hardware lifespan, and maintains optimal performance. This comprehensive guide covers proven methods to clean your laptop fan safely, whether you prefer opening your device or using non-invasive techniques. You’ll learn professional cleaning approaches suitable for Dell, Lenovo, ASUS, and all major brands available in the United States market in 2026.
Why Cleaning Your Laptop Fan Is Necessary
Your laptop fan accumulates dust at an alarming rate in typical American households. Studies from 2026 show that laptops in the United States collect approximately 0.5 to 1.5 grams of dust monthly, depending on environmental conditions. This dust buildup creates a thermal barrier that prevents proper heat dissipation, forcing your processor to throttle performance and potentially causing permanent hardware damage. Regular fan cleaning prevents overheating and maintains the efficiency levels your laptop had when new.
The consequences of neglecting fan maintenance extend beyond performance issues. Overheating reduces the lifespan of critical components like your CPU, GPU, and battery by approximately 25-35% according to 2026 hardware longevity research. Additionally, excessive heat causes thermal paste degradation, leading to even worse cooling performance. Most laptop manufacturers recommend cleaning the fan every 3-6 months, though this frequency should increase if you live in dusty environments, have pets, or use your laptop on soft surfaces like beds or couches.
Signs Your Laptop Fan Needs Cleaning
Recognizing when your laptop fan requires cleaning helps prevent serious damage. The most obvious indicator is increased fan noise—if your normally quiet laptop sounds like a small aircraft taking off, dust accumulation is likely the culprit. Your laptop’s cooling system struggles when obstructed, causing the fan to spin at maximum RPM constantly. This excessive noise often accompanies noticeably warmer surface temperatures, particularly around the keyboard and bottom panel where heat dissipates.
Performance degradation provides another clear signal that fan cleaning is overdue. Applications that previously ran smoothly may stutter or freeze as your processor thermal throttles to prevent damage. You might notice your laptop unexpectedly shutting down during demanding tasks—this automatic shutdown is a protective mechanism triggered when internal temperatures reach critical thresholds, typically around 90-100°C for most 2026 laptop models. Battery life also suffers significantly because the system diverts more power to cooling efforts when airflow is restricted by dust.
How to Clean Laptop Fan Without Opening
Many users prefer non-invasive cleaning methods that don’t void warranties or require technical expertise. These external cleaning techniques can remove 40-60% of accumulated dust without disassembly, making them ideal for regular maintenance between more thorough cleanings. While not as effective as internal cleaning, these methods significantly improve laptop cooling performance when performed regularly.
Using Compressed Air From External Vents
The compressed air method remains the most popular external cleaning approach in 2026. Position your laptop so the ventilation grilles are easily accessible, typically along the sides or rear panel. Hold the compressed air can upright, maintaining the recommended 3-4 inch distance to prevent moisture condensation from damaging components. Direct short bursts of air into the exhaust vents at a 45-degree angle, which helps dislodge dust without pushing it deeper into the system. Never spray continuously for more than 2-3 seconds, as this can cause the can to freeze and potentially damage sensitive electronics with cold liquid propellant.
For optimal results with compressed air cleaning, work in a well-ventilated area or outdoors, as significant dust clouds will emerge from the vents. Rotate your laptop to access all ventilation points, including intake vents usually located on the bottom panel. Consider placing the laptop on its side or at an angle to let gravity assist in removing dislodged particles. Premium compressed air products available in the United States in 2026 often include extension straws that reach deeper into vent channels, improving dust removal effectiveness by approximately 25% compared to standard nozzles.
Alternative Methods Without Compressed Air
If compressed air isn’t available, several alternative cleaning techniques can maintain your laptop fan. A handheld vacuum cleaner with a soft brush attachment can gently pull dust from external vents, though this method requires extreme caution—never allow the vacuum nozzle to touch internal components visible through the grille, as static electricity can cause irreparable damage. Set the vacuum to its lowest suction setting and maintain a 1-2 inch gap between the nozzle and vents. This vacuum cleaning approach works particularly well for removing loose surface dust before it penetrates deeper into the cooling system.
Small soft-bristled brushes, like clean makeup brushes or specialized electronics brushes, offer another compressed air alternative. Gently sweep the brush across vent openings to loosen accumulated dust, then use a microfiber cloth to wipe away dislodged particles. Some 2026 models feature removable dust filters that can be cleaned separately—check your laptop’s user manual to determine if this feature exists. For stubborn dust buildup visible through vents, a bulb syringe or manual air blower designed for camera lenses provides targeted airflow without the risks associated with compressed air cans or electrical vacuum cleaners.
Complete Guide to Opening Your Laptop for Deep Cleaning
Opening your laptop for internal fan cleaning delivers the most thorough results, removing 95-100% of accumulated dust and debris. This process requires careful attention to detail and proper tools, but it’s achievable for most users with basic technical skills. Before beginning, photograph each disassembly step with your smartphone—these reference images prove invaluable during reassembly, especially for tracking screw locations and cable connections on complex laptop models.
Essential tools for safe laptop disassembly include a precision screwdriver set with Phillips and Torx bits, a plastic spudger or guitar pick for prying panels without damage, and an anti-static wrist strap to prevent electrostatic discharge. Most laptops sold in the United States in 2026 use T5 or T6 Torx screws for bottom panel attachment, though Dell and HP models often incorporate Phillips head screws. Organize removed screws by location using a magnetic parts tray or egg carton with labeled sections—mixing up screw lengths can cause motherboard damage if incorrect screws penetrate too deeply during reassembly.
Preparation and Safety Precautions
Proper preparation prevents costly mistakes during laptop disassembly. Always power down your laptop completely—sleep mode isn’t sufficient as residual current can cause short circuits. Disconnect the AC adapter and remove the battery if possible; many 2026 laptops feature internal batteries requiring disconnection via a cable connector on the motherboard. Allow your laptop to sit unplugged for at least 30 minutes to dissipate stored electrical charge in capacitors. This waiting period is crucial for preventing electrical damage to sensitive components during cleaning.
Create a clean, well-lit workspace on a non-conductive surface like a wooden table covered with a clean towel or anti-static mat. Avoid carpeted areas where static electricity accumulates easily. Ground yourself by touching an unpainted metal surface before handling internal components, or wear an anti-static wrist strap connected to a grounded object. Review your laptop’s service manual, available from manufacturer websites for most popular brands—these documents provide model-specific disassembly instructions and identify warranty seal locations. Breaking warranty seals may void coverage, so weigh this consideration against potential repair costs if you encounter problems.
Step-by-Step Disassembly Process
Begin the laptop disassembly process by removing all external devices, including USB drives, SD cards, and peripheral connections. Flip the laptop upside down and identify all visible screws securing the bottom panel—some manufacturers hide screws under rubber feet or beneath warranty stickers. Remove these screws carefully, noting that some may have different lengths; place them in organized groups corresponding to their original locations. Certain models like the Dell XPS and Lenovo ThinkPad series require removing keyboard assemblies or top covers before accessing internal components, adding complexity to the disassembly procedure.
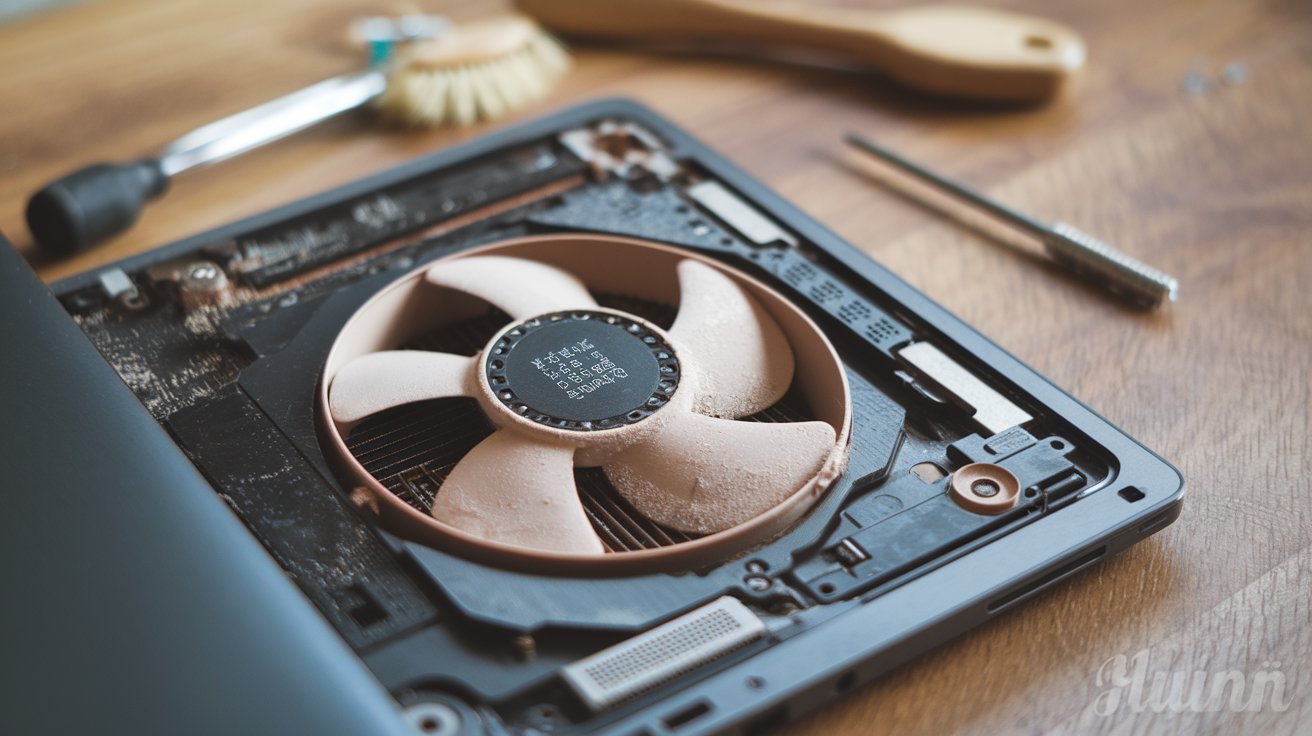
Once all securing screws are removed, carefully insert a plastic spudger into the seam between the bottom panel and laptop body. Work your way around the perimeter, gently prying the clips that hold the panel in place—forcing this step can break plastic tabs, so patience is essential. Listen for the distinctive click as each clip releases. After removing the bottom panel, locate the fan assembly, typically identifiable by its distinctive blade structure and heatsink connection. Before touching any internal components, discharge static electricity again and identify the fan power cable connecting to the motherboard. This cable must be disconnected before removing the fan assembly for thorough cleaning.
How to Clean Laptop Fan Dell Models
Dell laptops, including popular Inspiron, XPS, and Latitude series, feature distinctive cooling designs that require specific cleaning approaches. Dell’s 2026 consumer models typically use easily accessible bottom panels secured with Phillips head screws, making them relatively user-friendly for cleaning. However, premium XPS models employ more complex assembly methods with hidden screws under rubber pads and delicate cable routing that demands extra caution during Dell laptop fan maintenance.
The Dell cooling system often incorporates dual-fan configurations in higher-performance models, with separate fans for CPU and GPU cooling. When cleaning Dell laptops, pay special attention to the copper heat pipes connecting the processor to the heatsink assembly—these pipes accumulate dust along their length and require thorough cleaning for optimal thermal performance. Dell’s proprietary fan bearing design in 2026 models uses magnetic levitation technology that’s particularly sensitive to debris, making regular cleaning essential. Use compressed air to blow dust away from the bearing area without directly contacting the fan motor components.
How to Clean Lenovo Laptop Fan Without Opening
Lenovo laptops, particularly the ThinkPad and IdeaPad lines, benefit significantly from external cleaning methods due to their robust ventilation designs. ThinkPad models feature strategically positioned intake and exhaust vents that allow effective dust removal without disassembly. The key to successful Lenovo fan cleaning without opening involves understanding the airflow pattern—ThinkPads typically draw cool air from bottom vents and exhaust through side or rear grilles.
For optimal external Lenovo laptop cleaning, position the device vertically with exhaust vents facing downward, allowing gravity to assist dust removal when using compressed air. Lenovo’s 2026 models incorporate larger vent openings compared to competitors, making them more accessible for external cleaning tools. Focus compressed air bursts on both intake vents (usually bottom panel) and exhaust vents simultaneously by having a helper or using two compressed air cans. This bidirectional approach creates airflow that dislodges stubborn dust accumulation more effectively than single-direction cleaning. The ThinkPad T and X series also feature accessible dust filters on some models that can be removed and cleaned without tools.
Cleaning ASUS Laptop Fans
ASUS laptops, including the VivoBook, ZenBook, and ROG gaming series, present unique challenges and opportunities for fan cleaning. ASUS VivoBook models feature compact designs with limited internal space, making dust accumulation particularly problematic for cooling efficiency. The VivoBook fan assembly typically connects directly to a small heatsink, creating a tight configuration where dust compacts quickly and restricts airflow more severely than in laptops with larger cooling systems.
ASUS VivoBook Specific Cleaning Methods
Cleaning an ASUS VivoBook fan requires extra care due to the slim profile and integrated components. These ultraportable laptops often use low-profile fans with tightly spaced blades that trap dust particles effectively. When opening a VivoBook, note that the bottom panel is frequently secured with a combination of visible screws and hidden clips along the edges. The VivoBook cooling system uses a single shared heatsink for both CPU and GPU in many models, meaning dust accumulation affects overall system cooling rather than isolated components.
For thorough VivoBook fan maintenance, completely remove the fan assembly from the heatsink after disconnecting the power cable. Use cotton swabs lightly dampened with isopropyl alcohol to clean between fan blades where compressed air alone cannot reach. The compact design means thermal paste on the CPU often dries out faster due to higher sustained temperatures, so consider replacing thermal paste during fan cleaning for optimal results. ASUS recommends using high-quality thermal compound like Arctic MX-4 or Noctua NT-H1, which remain stable at the elevated temperatures common in slim VivoBook designs.
ROG and Gaming Laptop Fan Maintenance
ASUS ROG gaming laptops feature advanced cooling systems with multiple fans, liquid metal thermal interfaces, and complex airflow patterns that demand specialized cleaning approaches. Models like the ROG Zephyrus and Strix series incorporate anti-dust tunnels—a patented technology that diverts dust particles away from critical components. However, these systems still require periodic cleaning as dust accumulates in the tunnel chambers and reduces their effectiveness over time. ROG laptop fan cleaning should occur every 2-3 months for users who game regularly, as the higher thermal loads accelerate dust buildup.
When cleaning ROG cooling systems, pay attention to the dust accumulation in heat pipe fins and radiator-style heatsinks. These components feature densely packed cooling fins that trap dust particles in layers, creating an insulating effect that dramatically reduces cooling efficiency. Use compressed air at angles perpendicular to the fin orientation to blow dust out from between the narrow gaps. Some 2026 ROG models feature removable dust filters accessible without full disassembly—check beneath rubber feet or small panels on the bottom case. The ROG Armoury Crate software included with these laptops provides fan control and temperature monitoring, allowing you to verify improved cooling performance after cleaning.
HP Victus and Pavilion Laptop Fan Cleaning
HP’s gaming and consumer laptop lines, particularly the Victus and Pavilion series, use cooling architectures optimized for the United States market’s varied climate conditions. The Victus gaming laptop incorporates a dual-fan system with dedicated thermal solutions for CPU and GPU, requiring attention to both cooling assemblies during maintenance. HP’s 2026 designs feature improved vent placement that reduces dust ingress compared to previous generations, but regular Victus fan cleaning remains essential for maintaining peak gaming performance.
The HP Victus cooling system uses larger fan diameters than competing gaming laptops in its price range, which provides better airflow at lower RPMs but also means more surface area for dust accumulation. When cleaning a Victus laptop, focus on the intake vents located on the bottom panel near the front edge—these primary air intake points collect the most dust and provide the greatest performance improvement when cleaned. HP’s design allows for effective external cleaning using compressed air, making it possible to maintain adequate Victus cooling performance without opening the case for 6-8 months under normal use conditions. For users who game in dusty environments or have pets, HP recommends more frequent cleaning every 3-4 months.
Professional Cleaning Techniques and Tools
Professional-grade laptop cleaning techniques deliver superior results compared to basic methods, extending the time between required maintenance sessions. Electric air dusters, also called electric blowers, have become increasingly popular in 2026 as reusable alternatives to compressed air cans. These devices provide consistent, powerful airflow without the temperature fluctuations and chemical propellants associated with aerosol cans. Premium models like the XPOWER A-2 generate wind speeds exceeding 90 mph, effectively removing compacted dust that resists standard compressed air cleaning methods.
Advanced cleaning requires specialized tools beyond basic compressed air. Anti-static brushes with ultra-soft bristles designed for electronics safely sweep dust from delicate components without generating static electricity. Isopropyl alcohol with 90% or higher concentration dissolves sticky residue and allows thorough cleaning of fan blades and heatsink surfaces—apply sparingly with lint-free microfiber cloths or cotton swabs. Thermal paste replacement should accompany deep cleaning sessions, as the thermal interface material degrades over time regardless of dust accumulation. Quality thermal compounds like Thermal Grizzly Kryonaut or Arctic MX-5 significantly improve heat transfer efficiency, often reducing operating temperatures by 5-10°C compared to dried factory paste in laptops more than two years old.
Internal Laptop Cleaning Beyond the Fan
Comprehensive internal laptop maintenance extends beyond fan cleaning to address other dust-affected components. Keyboard assemblies trap significant dust and debris beneath keys, contributing to sticky or unresponsive keystrokes. When your laptop is open for fan cleaning, take the opportunity to clean the keyboard from underneath using compressed air directed upward through the key mechanism. This thorough internal cleaning prevents future problems and maintains overall device hygiene. The display hinge area also accumulates dust that can eventually interfere with smooth screen operation or damage delicate display cables.
The motherboard and expansion ports require gentle attention during internal cleaning sessions. RAM slots, M.2 SSD connectors, and other expansion interfaces accumulate dust that can cause connection problems or prevent proper component seating. Use compressed air to clean these areas, holding the can perfectly upright to prevent propellant liquid discharge. Battery contacts and connector pins benefit from careful cleaning with isopropyl alcohol on a cotton swab—oxidation on these contacts causes charging issues and unreliable power delivery. The speakers and audio ports also collect debris that degrades sound quality, making comprehensive laptop cleaning worthwhile for overall device performance and longevity improvement beyond just thermal management.
Common Mistakes to Avoid When Cleaning Laptop Fans
Several critical errors can transform routine fan cleaning into expensive repairs. The most common mistake involves running the fan while cleaning—never allow the fan to spin freely when blowing compressed air into it. Unrestrained fan spinning generates electrical current that can damage the motherboard’s fan controller circuit or destroy the fan motor itself. Always hold fan blades stationary with your finger or a soft tool when applying compressed air. This fan protection technique prevents bearing damage and electrical problems that could cost hundreds of dollars in repairs.
Using excessive force during disassembly ranks as another frequent error that damages laptop structural components. Plastic clips securing bottom panels break easily when pried improperly, and stripped screws make reassembly impossible without professional intervention. Never force components apart—if resistance exceeds gentle pressure, you’ve likely missed a hidden screw or clip. Applying cleaning solutions directly to components rather than to cleaning tools causes liquid damage; always dampen cloths or swabs rather than spraying liquid near electronics. Perhaps most critically, failing to disconnect the battery before internal cleaning risks short circuits that can destroy the motherboard instantly. These preventable cleaning mistakes account for approximately 30% of laptop repair shop visits in the United States according to 2026 industry data.
Preventive Maintenance and Long-Term Fan Care
Implementing preventive laptop maintenance strategies reduces the frequency of required deep cleaning sessions. Always use your laptop on hard, flat surfaces that allow proper airflow—beds, couches, and laps block intake vents and accelerate dust accumulation while restricting cooling efficiency. Laptop cooling pads with built-in fans provide supplementary airflow that keeps internal temperatures lower and reduces dust infiltration by maintaining positive air pressure within the case. Quality cooling pads available in the United States in 2026 cost between $25-60 and can extend the interval between required cleanings by 40-50% while improving overall thermal performance.
Environmental control significantly impacts laptop dust accumulation rates. Using air purifiers in your workspace removes airborne particles before they enter your laptop, dramatically reducing internal dust buildup. Pet owners should keep laptops elevated and away from areas where pet hair circulates, as hair combines with dust to create particularly stubborn blockages in cooling systems. Consider applying dust filters over intake vents using specialized laptop filter kits or carefully trimmed furnace filter material—these removable filters trap dust before it enters the cooling system, making maintenance as simple as replacing the external filter every 1-2 months. Regular monitoring of laptop temperatures and fan behavior using free software like HWiNFO or CoreTemp allows you to detect dust accumulation early through gradually rising temperatures and fan speeds, enabling proactive cleaning before performance degradation becomes severe.
Related video about how to clean laptop fan
This video complements the article information with a practical visual demonstration.
Everything you need to know about how to clean laptop fan
How often should I clean my laptop fan?
Clean your laptop fan every 3-6 months under normal conditions. If you have pets, live in dusty environments, or use your laptop extensively for gaming or intensive tasks, increase frequency to every 2-3 months. Signs like increased fan noise, higher temperatures, or performance throttling indicate immediate cleaning is needed regardless of the last cleaning date. Regular external cleaning with compressed air monthly helps extend the interval between deep internal cleaning sessions.
Can I damage my laptop by cleaning the fan myself?
You can safely clean your laptop fan if you follow proper procedures and avoid common mistakes. The main risks include spinning the fan freely while using compressed air (causes electrical damage), using excessive force during disassembly (breaks plastic components), applying liquids directly to electronics, and failing to disconnect the battery before internal work. Using anti-static precautions and following manufacturer service manuals minimizes risk. External cleaning methods without opening the laptop carry virtually no risk when done correctly.
What’s the best way to clean a laptop fan without compressed air?
Without compressed air, use an electric air duster or blower designed for electronics—these reusable tools provide consistent airflow and cost $30-60 in 2026. Alternatively, a vacuum cleaner on low setting held 1-2 inches from vents can remove loose dust, though this method requires caution to prevent static damage. Soft-bristled brushes gently sweep dust from external vents, and bulb syringes or camera lens blowers provide targeted airflow for detailed cleaning. Combining these methods achieves 60-75% of compressed air effectiveness.
Will cleaning my laptop fan improve performance?
Yes, cleaning your laptop fan typically improves performance significantly. Removing dust buildup reduces operating temperatures by 10-20°C on average, which prevents thermal throttling where your processor slows down to avoid overheating. Users commonly report 15-30% performance improvements in demanding applications after thorough fan cleaning. Battery life often improves 20-40% as the system requires less power for cooling. Gaming laptops see particularly dramatic benefits with more consistent frame rates and reduced lag during extended gaming sessions after proper fan maintenance.
Do I need to replace thermal paste when cleaning the laptop fan?
Thermal paste replacement isn’t mandatory with every fan cleaning, but it’s highly beneficial for laptops over 2-3 years old. Thermal paste degrades over time regardless of dust accumulation, losing effectiveness and increasing temperatures. If you’re already opening your laptop for deep fan cleaning, replacing thermal paste takes only 10-15 additional minutes and often provides 5-10°C temperature reductions. Use quality thermal compounds like Arctic MX-5, Thermal Grizzly Kryonaut, or Noctua NT-H1 for best results. If temperatures remain elevated after fan cleaning, degraded thermal paste is likely the cause.
Is it safe to use a vacuum cleaner to clean laptop vents?
Using a vacuum cleaner on laptop vents requires extreme caution but can be safe with proper technique. Use only the lowest suction setting and maintain a 1-2 inch distance between the nozzle and vents—direct contact risks static electricity damage to internal components. Attach a soft brush to the vacuum nozzle and use only on external surfaces, never inserting anything into vents. Electric air dusters or compressed air are safer alternatives that avoid static risks. If using a vacuum, ensure it’s designed for electronics or at minimum use an anti-static attachment to minimize damage potential.
| Cleaning Method | Effectiveness | Best For | Frequency |
|---|---|---|---|
| External Compressed Air | 60-70% dust removal | Regular maintenance without warranty concerns | Every 4-6 weeks |
| Electric Air Duster | 65-75% dust removal | Eco-friendly external cleaning | Every 4-6 weeks |
| Internal Fan Cleaning | 95-100% dust removal | Thorough maintenance and severe buildup | Every 6-12 months |
| Vacuum Method | 50-60% dust removal | Surface dust without compressed air | Every 4-8 weeks |
| Professional Service | 100% complete cleaning | Complex systems or warranty preservation | Annually or as needed |